Among the most watched properties of leather, abrasion resistance is one of them, because leather’s ability to withstand abrasion is directly related to the quality level and working life of leather. For instance, the common leather products we can touch in our daily life include leather belt, leather wallet, leather sofa, etc, which are inevitable to contact with body or clothing repeatedly during the use, forming the friction. If they are not abrasion resistant, the coatings or finishes will file away soon along with the increment of the usage time. You must be not satisfied with this level of product quality once you have bought them. If manufacturers want to develop a leather product with good performance, the most important thing at the first stage is mastering the wear resistance of material using a leather abrasion resistance tester.
Let’s learn more about how a Taber Abrasion Tester to test leather wear resistance.
1. Test Principle
The leather test piece is placed on the horizontally rotary platform revolving at the specified speed. 2 abrading wheels whose axles are parallel to the horizontal rub against the test piece under a certain pressure. One abrading wheel rubs the test piece outwards to the periphery, the other one rubs the test piece to the center. The change to the specimen is recorded within the defined period of running.
2. Apparatus
2.1 Test piece platform: capable of revolving horizontally at the velocity of (60±5)r/min.
2.2 Test piece holder: It is plane, round and dismountable.
2.3 2 pivoted arms: Feature 2 abrading wheels. The inner rim of abrading wheel is (26.2±0.25)mm from the axle of platform. The force of (250±10) g is applied to the test piece from each of abrading wheels.
2.4 Vacuum nozzle: located at the upper area of the test piece.
2.5 Counter: to show the revolution cycles of rotary platform.
2.6 Abrasive wheels: Tungsten carbide or rubber-based wheels, (12.7±0.1)mm in width, the maximum diameter 51.7mm, the minimum diameter 44.0mm. The diameter during the test shall keep consistent. Diameter of abrasive wheels shall be noted in the test report. The force exerted by wheel can be 250g(without extra weight), (500±10)g If extra weight added, (1000±20)g If additional weight added.
2.7 Specimen mounting sheet: 1.0mm in thickness, acting as adhesive to keep test piece rigid and flat.
2.8 Vacuum cleaner: Used to connect to the vacuum nozzle.
2.9 Abrasive paper: Silicon carbide, grade 150.
2.10 Soft brush or compressed air
2.11 Brush, stiff bristle
2.12 Gray scale
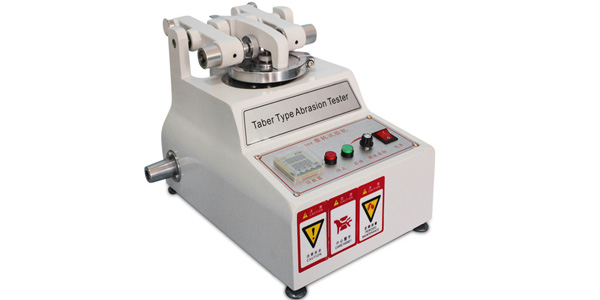
Taber Type Abrasion Tester
3. Test Procedure
3.1 Sampling
Cut 3 circular test pieces with diameter of (106±1)mm, the centre with a appropriately circular hole to match the central drive shaft.
If necessary, use sample mounting sheet to fix the test piece.
Air condition the test pieces under standard conditions prior to testing.
3.2 Recondition of abrasive wheels
3.2.1 Preparation of new abrading wheel: Attach the rubber-based abrasive wheels to the pivoted arms, ensuring the side with label is outward.
3.2.2 Add the additional weights to enable the loading of each wheel to be up to 1000g.
3.2.3 Choose proper abrasive papers and mount them on the specimen holders.
3.2.4 Turn on the vacuum cleaner and actuate the Taber abrasion machine to run for 20 cycles.
3.2.5 Replace the abrasive paper with a new one and repeat above steps, checking the abrasive wheels. If the color is not consistent, repeat the abrasive preparation with a new piece of abrasive paper. If the color is still not even, directly discard the wheels.
3.2.6 Remove the residues with a soft brush or compressed air. Stiff bristle is applied to remove loose particles from tungsten carbide wheels.
3.3 Abrasion of test piece
3.3.1 Fix the prepared abrasive wheels or reconditioned abrasive wheels to the pivoted arms, ensuring the correct installation that the labels face towards the centre of the test piece holder.
3.3.2 Select the proper loading of 250g or 500g or 1000g.
3.3.3 Secure the specimen to the test piece holder, and lower the abrasive wheels onto the surface of test piece, switch on the vacuum, turn on the machine to run for the given number of cycles(Can be selected from below cycles: 100, 250, 500, 1000, 2500, 5000r).
3.3.4 Stop the machine and take out the specimen to measure and record the damage conditions.
3.3.5 Recondition of abrasive wheels. Recondition rubber-based abrasive wheel after each test. Repeat the steps from 3.2.2 to 3.2.4. One abrasive paper can be run for 60 cycles at maximum, which means it can be only used for reconditioning 3 wheels. Recondition the tungsten carbide wheels by brushing with a rigid bristle brush to remove any loose particles.
4. Expression of Results
Measure and record any damage or exceptional phenomenon during the test, and exclude any damage 2mm from the edge of tested area or in depressed areas caused by starting or stopping the machine. If required, grey scale is used to test the color change of tested area.
5. Test Report
Below content shall be covered in test report:
5.1 Standard reference number which is used.
5.2 Specimen name, number, type, manufacturer or brand.
5.3 Testing conditions such as temperature, humidity, number of cycles, load etc.
5.4 Any observed damage or abnormal phenomenon.
5.5 If determining the color change of specimen, shall use grey scale to judge the grade of color change.
If you are looking for relevant test Standards in PDF, we can help you with it.
Amadetech is a professional leather testing instruments supplier from China, offering various lab testing equipment with decent quality in competitive price. Please click Taber Abrasion Tester to learn more If you are interested in it, or directly reach us by [email protected].